
Blender
Navigation
▢ obvious :
Rotate : middle mouse button cliqued
Zoom : scroll with mouse scroller
▢ not obvious :
Rotation around the selected object
Strafe : shift + middle mouse button cliqued
Select : right clic
switch perspective/ortho : numpad 5
font view : numpad 1
right view : numpad 3
left view : ctrl + numpad 3
back biew : ctrl + numpad 1
top view : numpad 7
bottom view : ctrl + numpad 7
Acting on objects :
▢ select :
Right clic on it, object will be highlighted in orange
▢ multi select :
Delect while holding shift, last selected object is in bright orange other in dull orange
bright orange is the active object
When you make a multi selection the manipulator move at their barycenter (or whatever you call the position betwen them)
▢ 3d cursor
Goes where you left clic (the white en red crosshead)
custom pivot point for all sort of transformations and operations, talk more about it later
can be reset using shift+c
▢ transform
Select the object and use 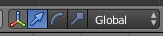 to move, rotate, scale
You can see the object manipulator changing, use one of the 3 axis to do something.

Hold shift while doing one of those operation to be more precise.
Tips : several object manipulator can be selected together using shift
▢ rotate, scale translate
Use one of those 3 buttons :
You can press x,y or z on your keyboard while doing one of the operation to do it on only on axis.
validate with left clic, cancel with right clic
Adding and remove object :
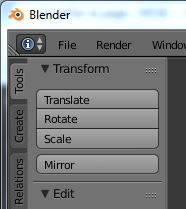
▢ Duplicate :
Select and object and on the left, under edit clic on duplicate
▢ Deleting
Select an object, press delete and press enter for confirmation
▢ Adding object (light, cube, sphere, etc)
Use the create tab of the left toolbar, object are added at the position of the 3d cursor (red and white crosshead)
so it can appear outside what you are viewing
Interface layout
https://cgcookie.com/blender/lessons/using-customizing-interface/
Meshing
▢ 3d cursor position
it can be change using the viewport propertie (clic the little + in the upper right corner just before the right toolbar)
under « 3d cursor » set cyz at 0
▢ Operator panel
in the down left corner, you can adjust the last mesh added, number of faces, position, rotation, align to view, etc
can be brought up using F6
Mesh anatomy
vertices : individual point
edge : line betwen the points
faces : the faces  made of 3 or more edges
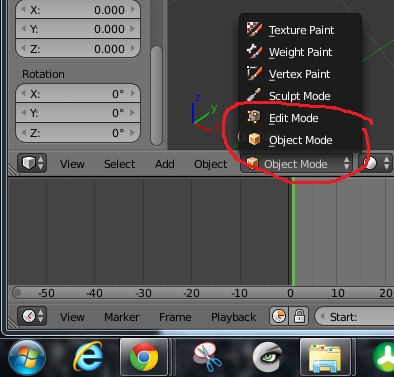
object/edit mode
object mode allows you to change orientation, scale, place of object, edit mode allows you to change the structure.
the tools in the left toolbar change in edit mode
if an object is selected you can toggle betwen the two using tab
points, edges or faces can be selected with right clic, multiple selection can be made with shift
then they can be moved with the object manipulator
Mesh selection mode
triangle : face with 3 points
quad : faces with 4 point
ingone : faces with more than 4 points

from left to right, vertex select, edge select, face select
the A key allw you to select everything
subdivide tool
The subdivide tool allows you to increasy mesh density or the numbers of faces for more precision,
it’s located in the left tool bar in the tool tab under Add
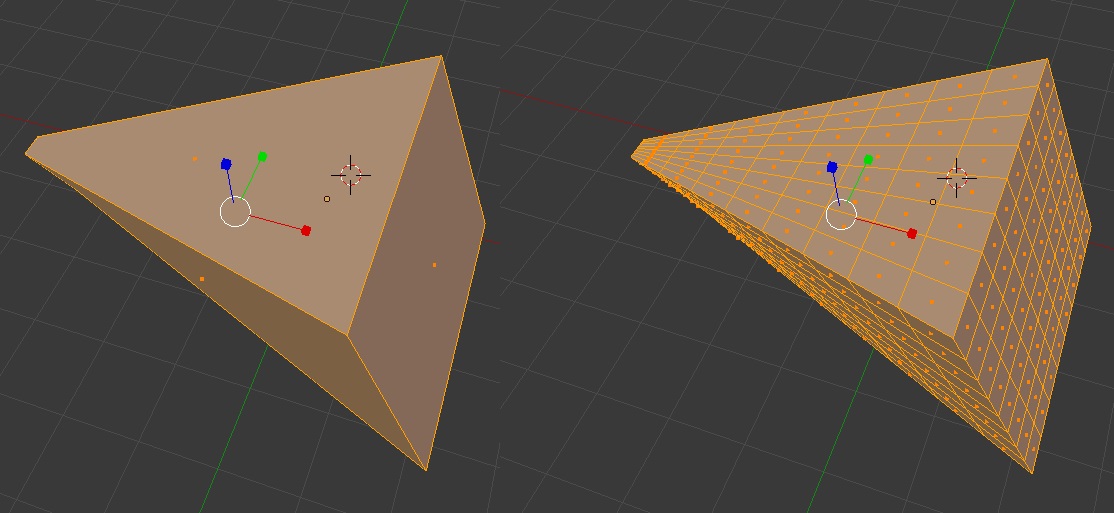
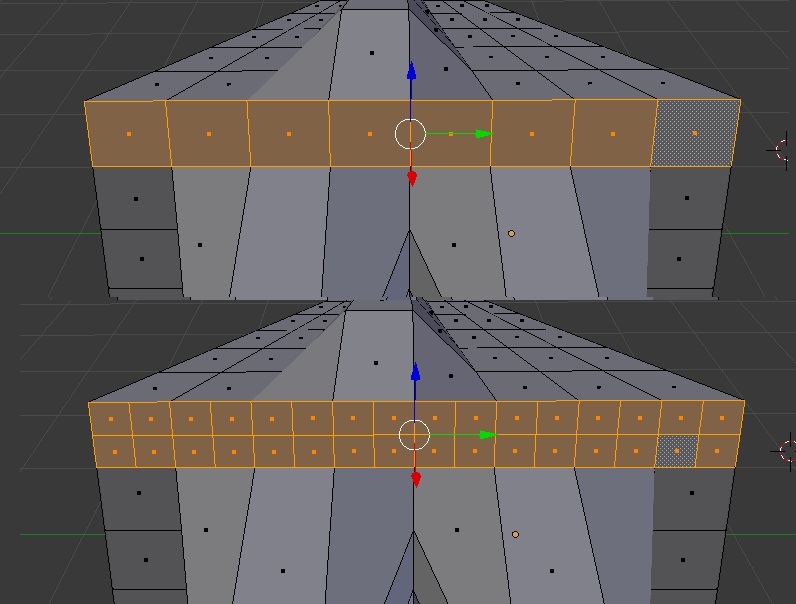
Selecting only edges will allow you to subdivide in only one direction
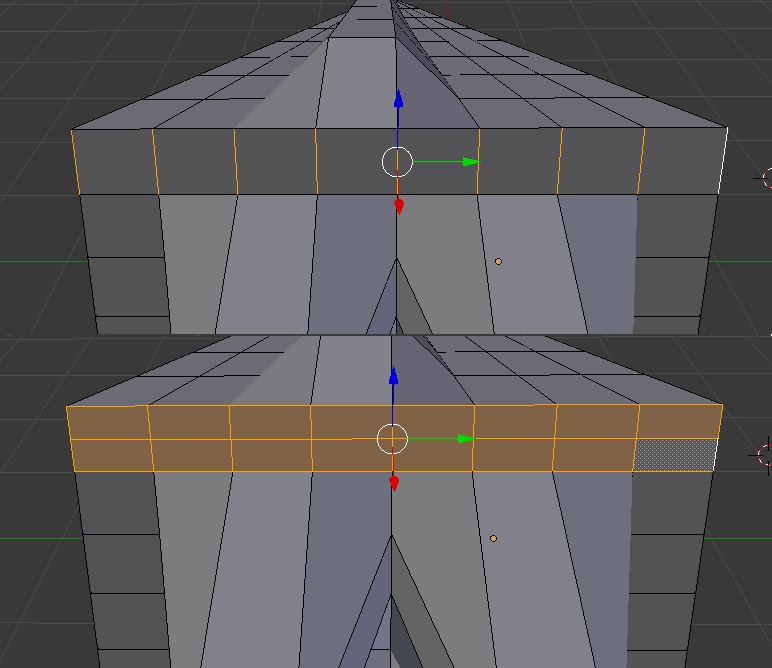
Selecting faces subdivide in both directions
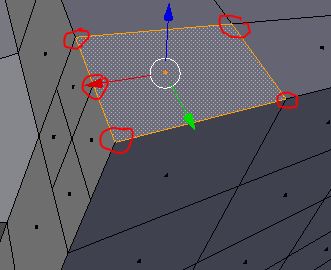
This face has now 5 vertex and is called an ingone
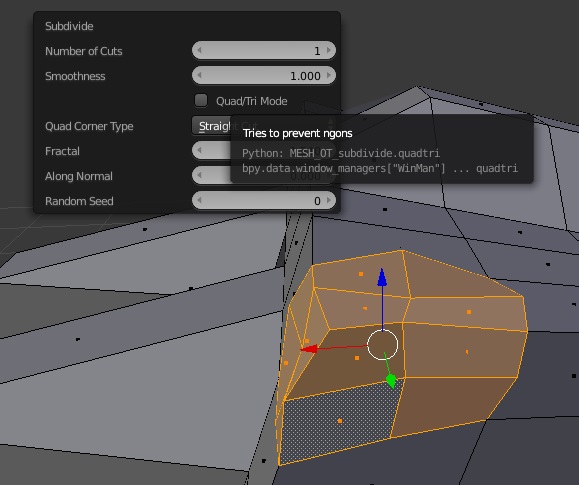
The operator panel being linked to the last operation can be brought up with F6 and allow you to change the subdivide parameter,
here some smoothness and fractals were added
Extrude tool
Extrude is in the left toolbar in the tool tab under add, generally you use it on faces, select a face and clic extrude>region
then use the object manipulator
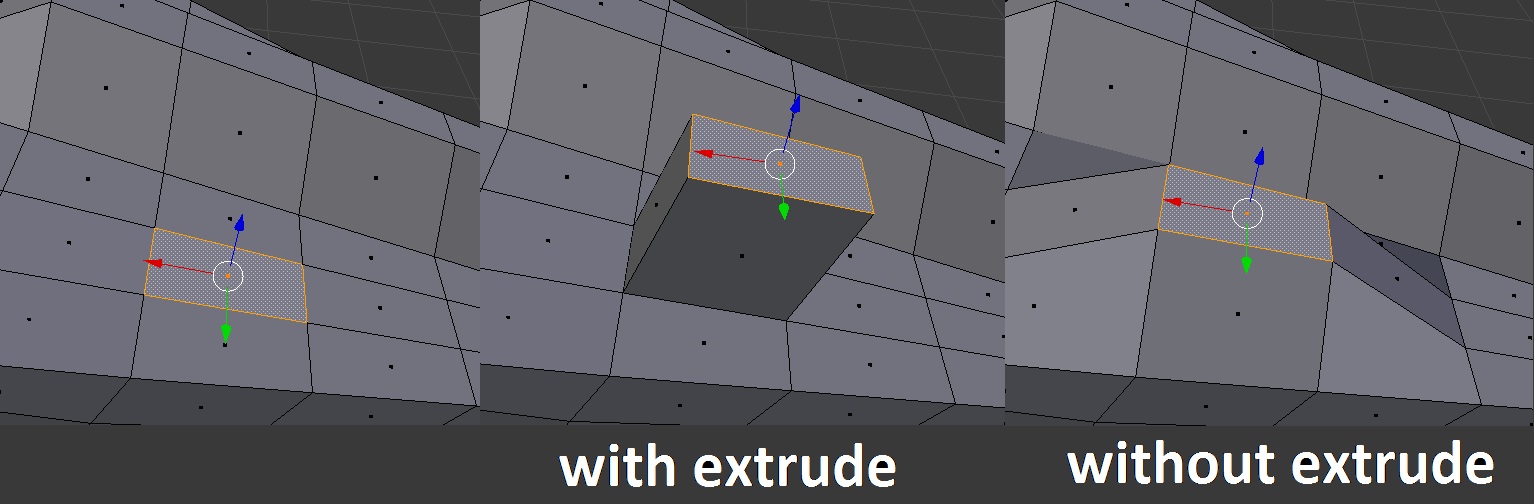
Extrude individual faces makes inner faces for every edges, comparaison betwenn the 2 modes :
/!\ if you cancel an extrusion using right clic or escape, the etruction has still be done (you’ll have tiny faces along your edges) don’t forget to use ctrl+z to remove them.
loop cut
Allows you to make cut on a model, number of cut and other panel can be changed on the operator panel
Loop cut can only cut on quad faces not triangles, that is why you often hear « good quad meshes », only use quads
example on the monkey (I use mouse scroll to increase the number of cut)
using inset
https://cgcookie.com/blender/lessons/inset-tool/
tools not available in 2.73 in the toolbar, use I
knife tool
https://cgcookie.com/blender/lessons/knife-tool/
making the selection grow/shrink
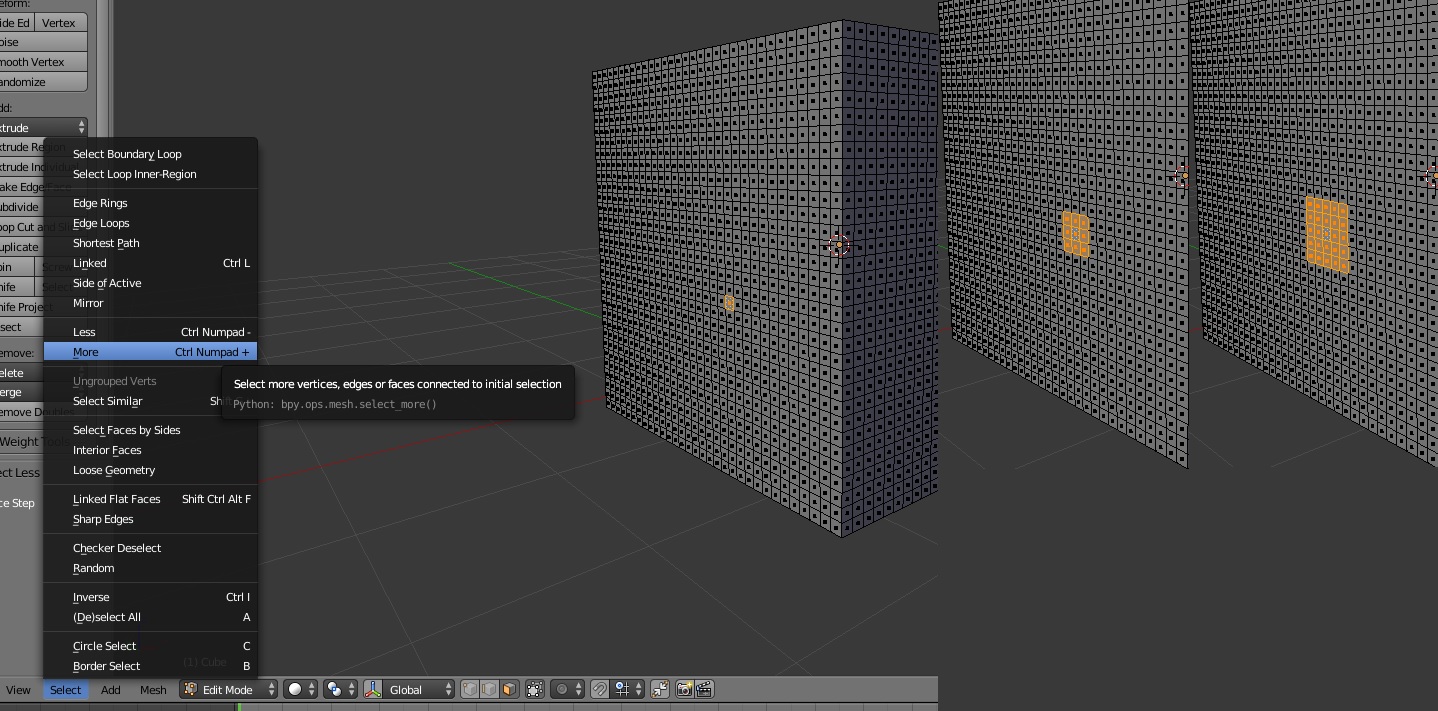
box and circle select
select>border select
select> circle select (scroll wheel to adjust size)
use this button to allow selection of invisible (faces that are behind those we see)

deselect : shift+left clic or one of the selection tools + middle clic
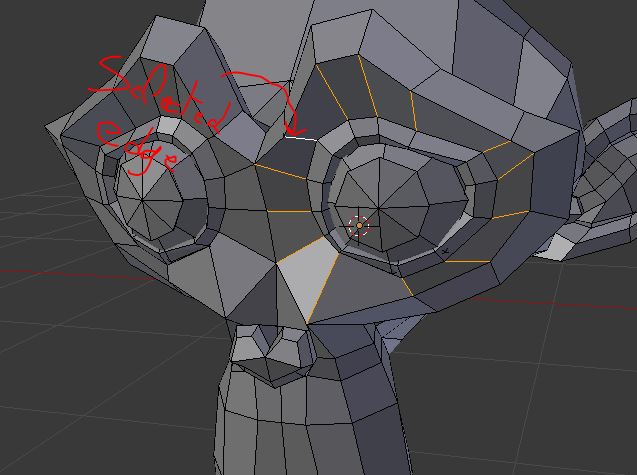
edge loop
use to select a path of vertices (continuous path of edges/vertices)
select an edge the use select>edge loop

alt+clic on an edge does the same thing (shift can be used to to multiple selection)
edge ring
continuous path of edges
select an edge then select>ring loop
or use ctrl+alt+clic (shift can be used to to multiple selection)
solid and wireframe shading
use the this menu to change the visibility mode
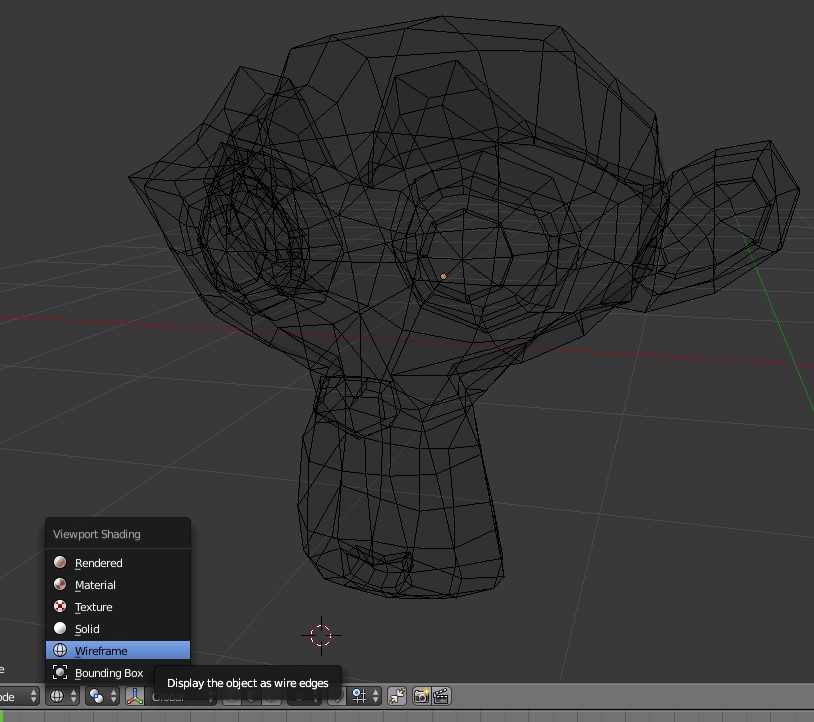
For example the wireframe mode allow you to see through and select behind faces
Limit selection to visible
Using this button :
allow to do see through selection while in solid mode.
Mesh hiding

If you go back to object mode then everythin will be here, if you then go back to edit mode the hidden piece will still be hidden.
So if anything is missing check if you don’t have hidden part.
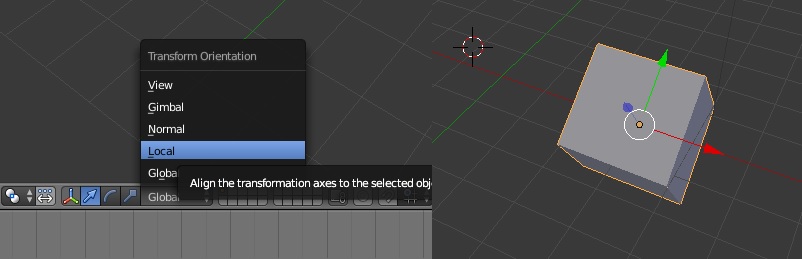
Transform Orientations: Global and Local Space
it enables us to more precisely, easily and quickly position our elements and objects where we need; no matter the orientation or location.
In essence, Global Space (also called World Space), refers to the way objects are transformed in relation to the scene origin, whereas Local Space refers to the way objects or elements are transformed in relation to the object itself.
▢ translations
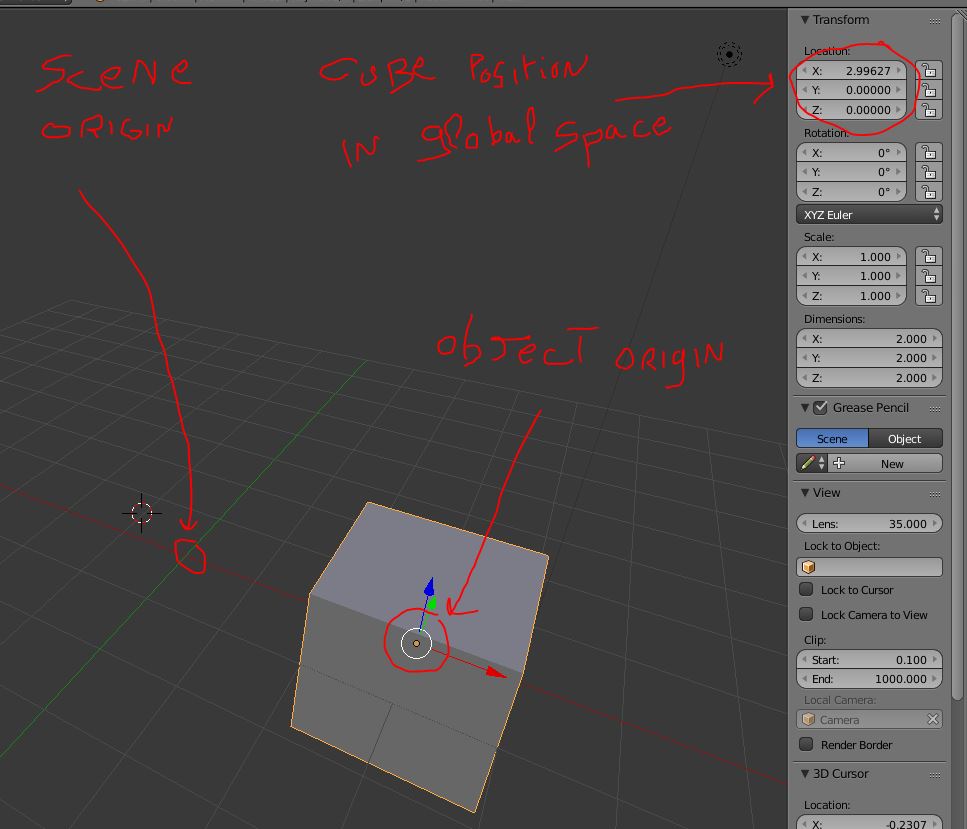
This cube has been translated on the X axis, as you can see it’s position moved in the global space
Now go in edit and move it again
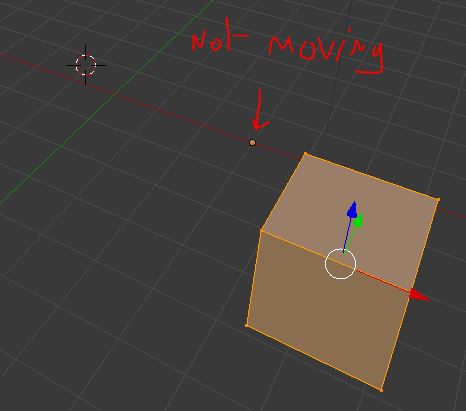
as you can see the center of the object (where the manipulator appear in object mode, the small orange dot in edit mode) is not moving, the object is the combinaison of the object point of origin
and the mesh, in edit mode you just moved the mesh, you moved it in local space
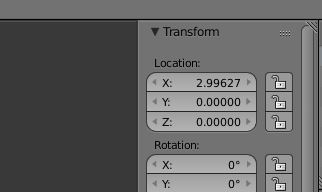
looked at it’s position in object mode, no change
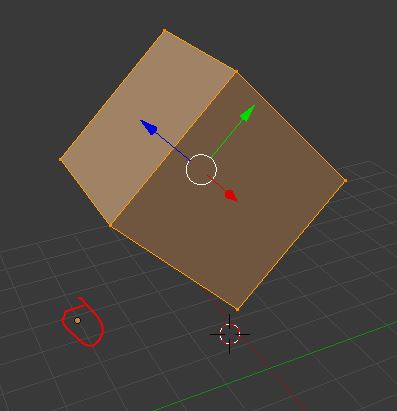
▢ Let now see Rotation
Cube rotated and translated in the global space
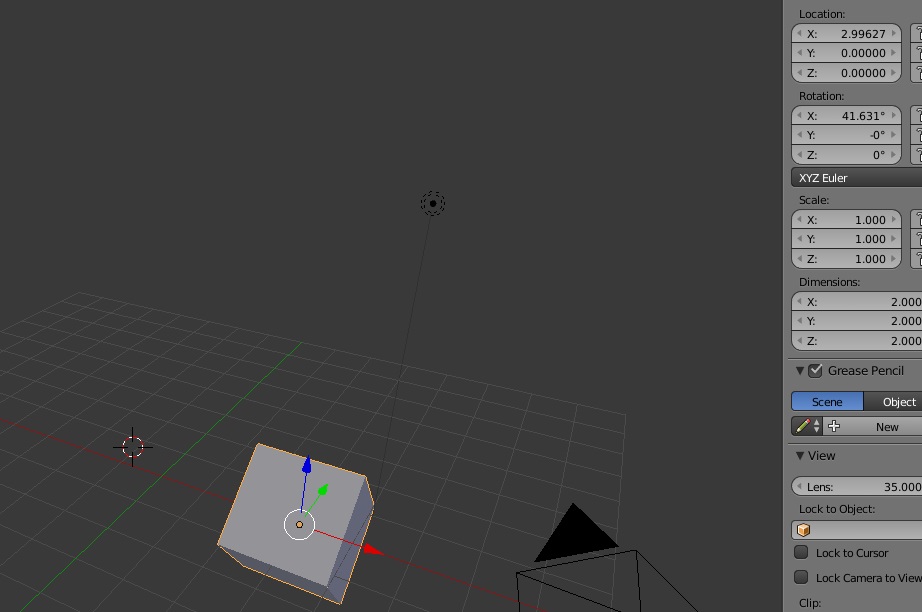
you can see that the munipulator arrow are still pointint in the x,y,z direction, no matter how you rotate the object.
however if you change this the transform orientation to local, then the object manipulator will orient itselft to follow
the global space rotation
Now if I go to edit mode I can move it to in local space orientation, however like earlier it will still move the mesh
in local space, relative to it’s origin
Object VS. Mesh Data
More specific to blender :
– object : container
– mesh data : points
for example, lets add an cube in object mode, then go to edit mode and add a sphere.
In object mode each time you add a shape it add it in a new object, here in edit mode the sphere was added to the object, meaning the cube and the sphere
are one and the same object.
linked duplicate
https://cgcookie.com/blender/lessons/shared-mesh-data/